Text to Speech (TTS)
Convert text into natural, lifelike audio with AI-powered voice synthesis
How to Generate Audio
The generation process is straightforward:
-
Input Text: Type or paste your text into the input box.
Note
The text input is extremely important. Good, high-quality input results in good output.
-
Select Voice: Choose the voice you wish to use from your Voices list.
Tip
If you want a happy voice, select a voice cloned from happy samples. If you want a specific dialect, choose a voice trained on that dialect.
- Adjust Settings: Configure settings like Speed or Temperature (detailed below).
- Generate: Click the Run button to create your audio file.
Generation Modes & Scenarios
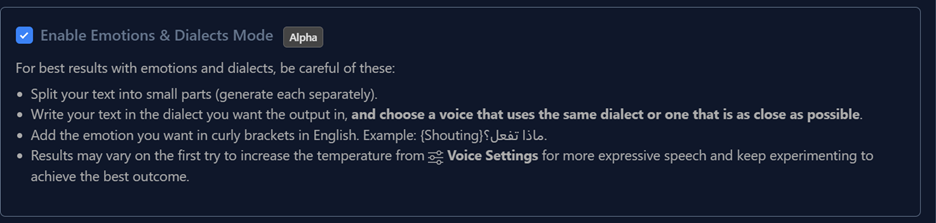
The most important step is deciding whether to check the "Enable Emotions & Dialects Mode" box. This changes how the AI interprets your text.
Scenario A: Expressive & Character Content (Emotion Enabled)
Ideal for gaming, animation, and audiobooks, where emotional range and character interaction are required.
| Capabilities | Generate natural, lifelike dialogue with high emotional range (laughter, whispering, etc.) |
| Languages | Supports 70+ languages including: Afrikaans, Arabic, Armenian, Assamese, Azerbaijani, Belarusian, Bengali, Bosnian, Bulgarian, Catalan, Cebuano, Chichewa, Croatian, Czech, Danish, Dutch, English, Estonian, Filipino, Finnish, French, Galician, Georgian, German, Greek, Gujarati, Hausa, Hebrew, Hindi, Hungarian, Icelandic, Indonesian, Irish, Italian, Japanese, Javanese, Kannada, Kazakh, Kirghiz, Korean, Latvian, Lingala, Lithuanian, Luxembourgish, Macedonian, Malay, Malayalam, Mandarin Chinese, Marathi, Nepali, Norwegian, Pashto, Persian, Polish, Portuguese, Punjabi, Romanian, Russian, Serbian, Sindhi, Slovak, Slovenian, Somali, Spanish, Swahili, Swedish, Tamil, Telugu, Thai, Turkish, Ukrainian, Urdu, Vietnamese, Welsh |
| Max Characters | 3,000 per request |
| Approx. Duration | ~3 minutes |
Scenario B: Professional & Stable Content (Emotion Disabled)
Well-suited for corporate videos, e-learning materials, and scenarios requiring consistent voice quality.
| Capabilities | Delivers consistent voice quality and personality while maintaining the speaker's unique characteristics |
| Languages | Supports 29 languages: English (USA, UK, Australia, Canada), Japanese, Chinese, German, Hindi, French (France, Canada), Korean, Portuguese (Brazil, Portugal), Italian, Spanish (Spain, Mexico), Indonesian, Dutch, Turkish, Filipino, Polish, Swedish, Bulgarian, Romanian, Arabic (Saudi Arabia, UAE), Czech, Greek, Finnish, Croatian, Malay, Slovak, Danish, Tamil, Ukrainian, Russian |
| Max Characters | 10,000 per request |
| Approx. Duration | ~10 minutes |
Controlling Voice & Performance
Prompting & Emotional Control
When the "Enable Emotions" box is checked:
For expressive generation, you can control the delivery using context and specific tags:
1. Contextual Prompting
The model interprets context directly from text. Adding descriptive text like "she said excitedly" or using exclamation marks will influence the speech emotion.
2. Audio Tags (Voice-Related)
Place these tags within your text to direct the voice. Note: Effectiveness depends on the selected voice.
| Category | Tags |
|---|---|
| Laughter | [laughs], [laughs harder], [starts laughing], [wheezing] |
| Whisper | [whispers] |
| Breathing | [sighs], [exhales] |
| Emotions | [sarcastic], [curious], [excited], [crying], [snorts], [mischievously] |
3. Sound Effects
[gunshot], [applause], [clapping], [explosion], [swallows], [gulps]
4. Experimental Tags
[strong X accent]— Replace X with desired accent, e.g.,[strong French accent][sings],[woo],[fart]
5. Punctuation & Text Structure
- Ellipses (…): Add pauses and weight
- Capitalization: Increases emphasis
- Standard Punctuation: Provides natural speech rhythm
The emotional model is in alpha. Very short prompts are more likely to cause inconsistent outputs. We encourage you to experiment with prompts greater than 250 characters.
When "Enable Emotions" is Unchecked
The system prioritizes stability and consistency.
- Context is Key: Rely on the natural flow of the sentence. The AI will read the text exactly as written.
- Pauses: Use tags like
<power/>,<exciting/>- Note: Do not use too many tags, as it may cause instability.
- Try to increase the expressiveness and temperature when you use it.
- Punctuation: Use dashes (-) for short pauses or ellipses (…) for hesitant tones.
- No Emotion Tags: Do not use curly brackets {} or audio tags here; the AI will likely read them out loud or ignore them.
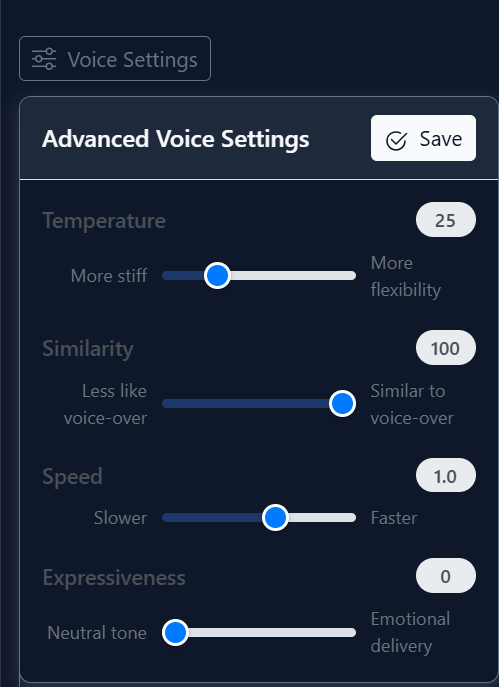
Voice Settings (Advanced Controls)
Adjust these sliders to fine-tune the output:
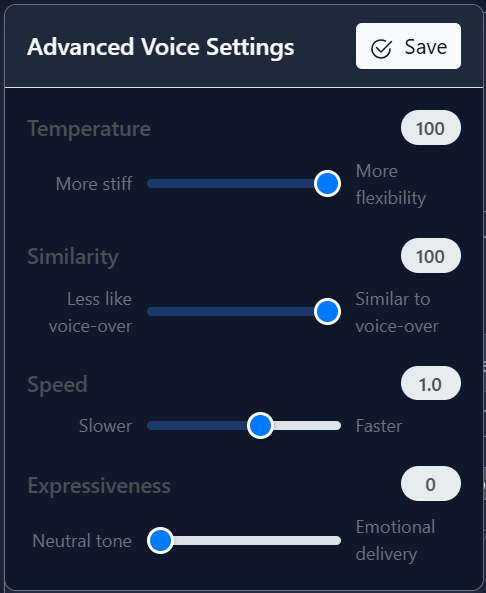
1. Temperature (Stability)
| Range | More stiff (Lower) ↔ More flexibility (Higher) |
| Effect | Higher temperature gives the AI more freedom and expressiveness but risks instability (hallucinations). Lower temperature makes the voice more rigid and stable. |
| Recommendation | Default around 25-50 is a good starting point. |
2. Similarity
| Range | Less like voice-over (Lower) ↔ Similar to voice-over (Higher) |
| Effect | Raising this increases resemblance to the original clone. However, if the reference audio has noise, high similarity may reproduce artifacts/crackling. |
3. Speed
| Range | 0.7 (Slower) ↔ 1.2 (Faster). Default is 1.0 |
| Effect | Controls the pace. Extreme values may affect quality. |
4. Expressiveness
| Range | Neutral tone (Lower) ↔ Emotional delivery (Higher) |
| Effect | Raising this brings the output closer to a natural performance. Raising it excessively risks strange behavior. |
Text Normalization (Pronunciation)
Normalization helps improve the pronunciation of numbers, dates, and complex text.
Normalization Modes
| Mode | Credits | Best For | Function |
|---|---|---|---|
| Basic Normalization | x1 | All languages | Standard text normalization to ensure natural speech flow. Recommended when using emotional prompting and aiming for dialogue written in dialects. |
| AI-Enhanced Normalization | x2 | Arabic language content | Comprehensive text refinement. It understands the context, segments sentences, and automatically applies diacritics (Tashkeel) so the AI pronounces Arabic words correctly. |
If you are aiming to generate dialects, AI-Enhanced normalization may not bring good results. Use Basic normalization for dialect content.
Best Practices for Input
Numbers
Text-to-speech models can struggle with formats like phone numbers or currencies.
| Type | Instead of | Write |
|---|---|---|
| Phone Numbers | 123-456-7890 |
"one two three, four five six..." |
| Currency | $45.67 |
"forty-five dollars and sixty-seven cents" |
| Abbreviations | Dr., St. |
"Doctor", "Street" |
| URLs | moknah.io/docs |
"moknah dot io slash docs" |
| Symbols | 100% |
"one hundred percent" |
Step-by-Step Guide
To get started generating your first audio using Text to Audio, or Text to Audio Studio, it's very simple. However, to get the most out of these features, there are a few things you need to keep in mind.
Step 1: Enter Your Text
Type or paste your text into the input box on the Text to Audio page. You can always include expressive tags in your text to achieve superior performance in voice generation.
- If "Emotions" are enabled: Use tags within brackets like
[shouting]or[breathing]. These are highly effective. - If "Emotions" are disabled: You can still describe the desired performance (e.g., writing "excited") or use tags enclosed as
</xxxx>, though these are experimental.
• All tags must be in English, as their use in other languages is experimental.
• The standard voice generation box accommodates only 1500 characters (we recommend ~200 characters per generation for best quality).
• For larger quantities (audiobooks, long articles), use the Text to Audio Studio instead.
Step 2: Voice Selection
Select the voice you wish to use from your list.
Voice selection is important; for instance, if you want a voice that speaks Standard Arabic, it is better to choose one from the start rather than a dialect-specific voice. However, if you select a voice dedicated to a specific dialect, it will still read Standard Arabic text—it may even give it good vitality.
If you want a performance in a specific dialect but don't want to activate the emotion parameter, increasing expressiveness and temperature will bring the performance closer to the dialect you desire. The more you practice, the better you will understand the balance achievable through your knowledge of the settings.
Step 3: Adjust Settings (Optional)
Modify the voice settings for the desired output. The recommended defaults are shown below:
Temperature
- Higher = More flexibility: Gives the AI model more freedom to control the voice, but raising it significantly may risk strange performance results.
- Lower = More stiff: Lowering it to zero will make the voiceover more rigid and lifeless.
Similarity
- Higher = Similar to voice-over: Increases resemblance to the original cloned voice. Maximizing it when the reference sample is not clean risks introducing audio artifacts like crackling.
- Lower = Less like voice-over: Lower it to obtain a cleaner result if the source has noise.
Speed
- Higher = Faster / Lower = Slower: Increasing to maximum or decreasing to minimum may degrade quality. Use only when necessary.
Expressiveness
- Higher = Emotional delivery: Brings the output closer to a natural performance, but raising it excessively risks strange behavior.
- Lower = Neutral tone: For large-scale voice generation, especially in the Voice Studio, we recommend keeping it at zero and increasing it experimentally on specific lines.
Emotion Settings
If you choose to Enable Emotion, the recommended setting is to raise the temperature:
Step 4: Choose Normalization
- Basic: Suitable for Arabic without additions, and suitable for other non-Arabic languages.
- AI-Enhanced: Exclusively designed for Arabic—understands context, segments sentences, and applies appropriate diacritics for pronunciation.
Step 5: Generate
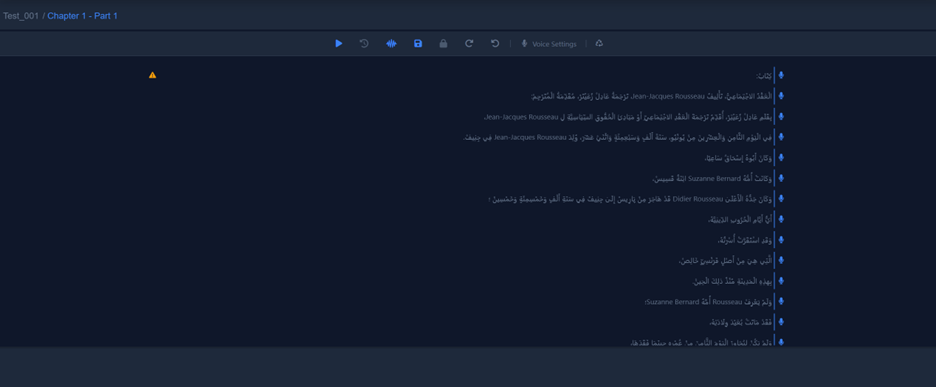
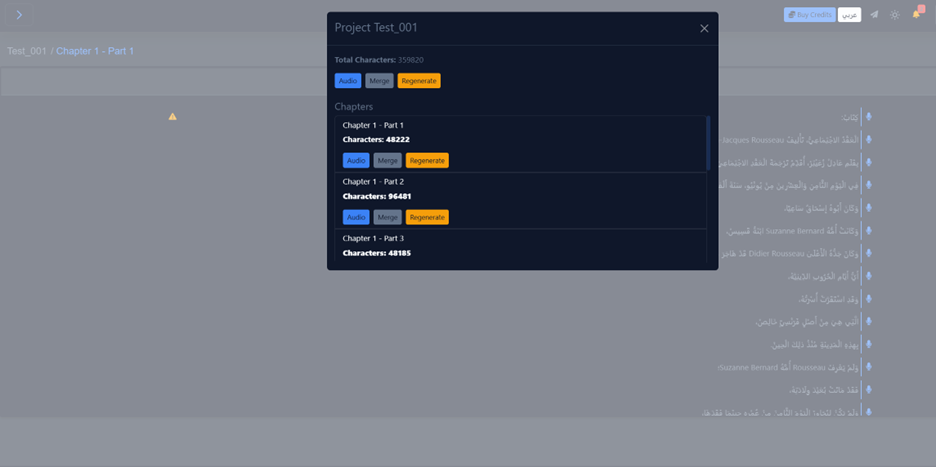
Click the 'Run' button on Text to Audio or the 'Generate' button on Text to Audio Studio to create your audio file. In the studio, you can generate thousands of lines at once by clicking on the merge button.
Text to Audio
A guide on how to turn text to speech with Moknah
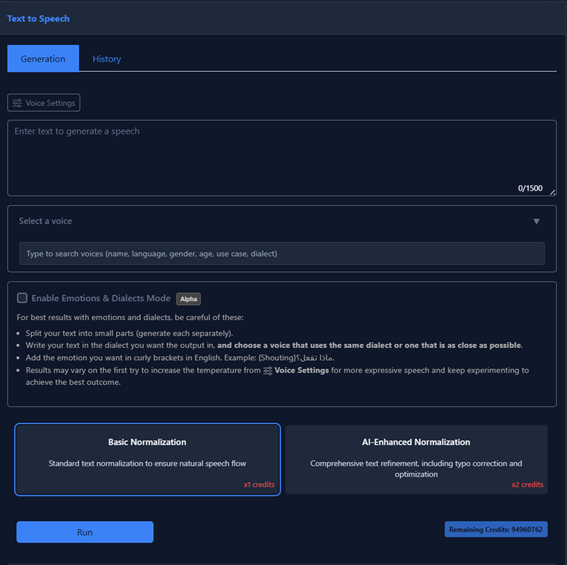
Based on the interface shown above, here are the steps to generate audio:
-
Enter Text: Type or paste the text you want to convert into speech in the large input box.
Note: There is a character limit of 1500 characters per request for this tool. - Select a Voice: Click the dropdown menu labeled "Select a voice". You can search for specific voices by name, language, gender, age, use case, or dialect.
-
Configure Mode (Optional):
- Standard Generation: Leave the "Enable Emotions & Dialects Mode" box unchecked for stable, professional narration.
- Emotions & Dialects Mode: Check this box if you want to control specific emotions or use regional dialects.
Tip: If checked, use curly brackets for emotions (e.g., {Shouting}) and ensure your text dialect matches the selected voice dialect.
-
Choose Normalization:
- Basic Normalization (x1 credits): Standard processing for natural speech flow.
- AI-Enhanced Normalization (x2 credits): Advanced processing that includes typo correction and optimization (recommended for complex text or Arabic).
- Generate: Click the blue "Run" button at the bottom to generate your audio.
You can click the "Voice Settings" button near the top left to adjust advanced parameters like speed or stability before generating.
Text to Audio Studio
Designed specifically for large-scale projects such as audiobooks, podcasts, and long-form voiceovers. Unlike the standard Text-to-Speech tool, which handles short inputs, the Studio allows you to manage, edit, and generate entire documents in one workspace.
Key Features
Bulk Import
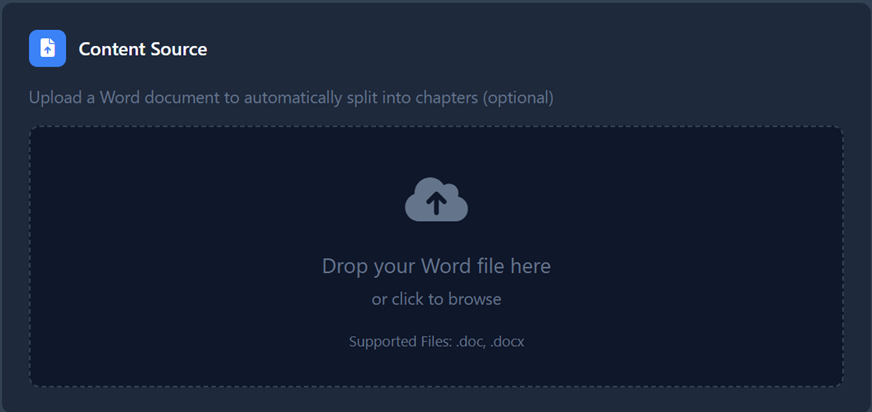
Upload complete books or scripts directly as Word documents (. doc, .docx).
Smart Segmentation
The system automatically splits your uploaded document into manageable lines or chapters. This allows you to treat each sentence or paragraph as a separate unit, applying different settings or edits if needed.
Integrated Translation
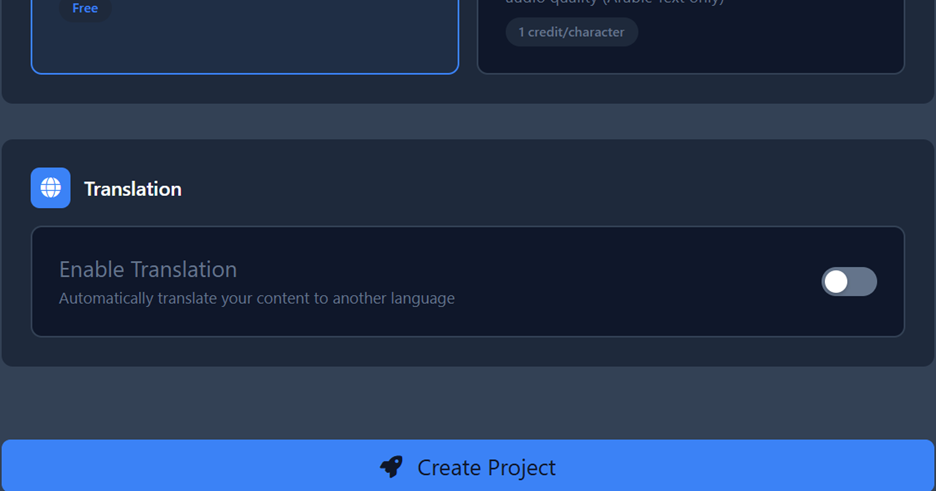
You can enable the "Translation" toggle during project setup to automatically translate your entire uploaded document into 100+ languages before audio generation.
Automated Production
Once your project is set up, you can generate audio for the entire project at once with a single click using the Convert button.
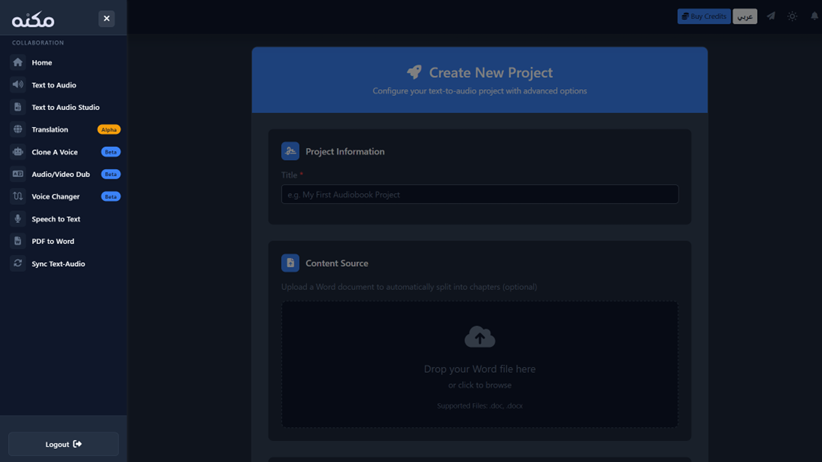
How to Create a Studio Project
- Project Info: Give your project a title (e.g., "My First Audiobook").
- Content Source: Drag and drop your Word file.
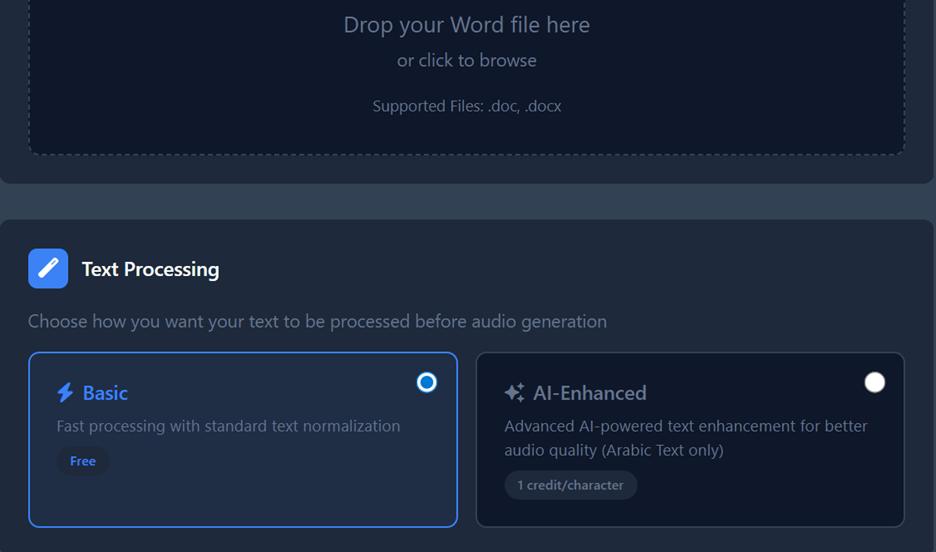
- Text Processing: Choose between:
- Basic: Fast processing for standard text.
- AI-Enhanced: Advanced processing (best for Arabic) to ensure correct pronunciation and diacritics across the full document.
- Translation (Optional): Toggle "Enable Translation" if you want the source text converted to another language.
- Create: Click Create Project. You will then be taken to the workspace where you can review segments and start the bulk generation process.
Learn more about making an audiobook in short steps: Convert Book to Audiobook in 15 Minutes
Pro Guide: Mastering Arabic AI Voice Generation
Skills, Tricks, & Best Practices
The ultimate goal of an AI voice creator is to generate the highest quality audio with the most natural performance while minimizing credit consumption. At Moknah, we provide you with advanced tools to achieve professional voiceovers. This guide covers the essential skills you need.
1. The Art of Segmentation (Text Preparation)
AI models follow the structure of your text literally. How you split your text determines the performance quality, pacing, and cost.
The Problem: The "Text Block"
If you paste a long paragraph without splitting it, the model treats it as one single line.
- Consequence: The AI often rushes to finish the long sentence, resulting in unnatural speed.
- Cost: If one word is wrong, you must regenerate the entire paragraph, wasting credits.
The Mistake: Random Splitting
If you hit "Enter" randomly in the middle of a sentence, the AI follows your instruction and will force a stop (Sukoon/Tskeen) at the end of every line.
- Consequence: This creates disjointed, choppy audio and increases grammatical errors.
The Pro Solution: Conscious Segmentation
- Rule #1: Split text based on punctuation (commas, periods, semicolons).
- Rule #2: If the source text lacks punctuation, add it yourself, especially before conjunctions (e.g., "and", "but").
- The Golden Rule: "Read the text aloud. Wherever you naturally pause for breath, start a new line there."
- For Long Content: Use the Text to Audio Studio—it automatically handles segmentation for you.
2. Diacritics & Normalization (Tashkeel)
Question: Should I fully diacritize (add Tashkeel to) the entire text manually?
Answer: No. Excessive manual diacritics place too many constraints on the model, weakening its ability to use its own "Self-Diacritization."
Solution A: AI-Enhanced Normalization (The "Magic" Button)
This feature is your secret weapon. When selected, the system is automatically:
- Contextually diacritizes the Arabic text.
- Adds necessary punctuation.
- Corrects typos.
Result: It solves 99% of pronunciation issues without manual effort.
Solution B: Manual "Strategic" Diacritics
If you use Basic Normalization, follow the "Minimalist Approach":
- What to diacritize: Only words that are difficult for you to read, or words with double meanings.
- How: You don't need to diacritize the whole word. Just add the diacritic to the specific letter that is ambiguous.
Example: To distinguish "Kutiba" (was written) from "Kataba" (he wrote), you only need to add the Damma on the first letter: كُتب
3. Text Formatting Rules
The model prefers clean, simple text. Follow these formatting rules:
| ✅ Do | ❌ Don't |
|---|---|
| Convert Numbers to Words ("Year two thousand and twenty" instead of "2020") | Use Bullet Points |
| Use Dashes (-) for parenthetical phrases | Use Character Stretching (H-e-l-l-o) |
| Use commas for natural pauses | Use Slashes/Underscores (/ or _) |
| Write clean, simple text | Use Ellipses (...) to separate sentences (unless you want a "hesitant" tone) |
The "Foreign Character" Trick (P, G, V, CH)
Arabic lacks certain sounds like P, G, or V. To force the AI to pronounce foreign names correctly within Arabic text, use Urdu/Persian characters:
| Target Sound | Letter | Common Arabic Writing | Correct Pronunciation |
|---|---|---|---|
| P | پ | بِيبْسِي (Bebsi) | پِيپْسِي (Pepsi) |
| G | گ | جُوجِل (Joojle) | گُوگِل (Google) |
| CH | چ | سَانْدُوِتْش (Sandwitsh) | سَانْدُوِچ (Sandwich) |
Urdu/Persian Letters Reference
| Letter | Sound | Description | Example |
|---|---|---|---|
| پ (Pe) | /p/ | Represents the sound /p/, which does not exist in standard Arabic | سافرتُ إلى پاكستان مع صديقي |
| چ (Che) | /ch/ | Represents the sound /ch/ as in "chair" | رأيتُ في الهند چايًا لذيذًا |
| ٹ (Ṭe) | /ṭ/ | Retroflex T, stronger and heavier than Arabic "ت" | عملتُ في مصنع ٹين |
| ڈ (Ḍāl) | /ḍ/ | Retroflex D, heavier than Arabic "د" | قابلتُ الداکٹر في المستشفى |
| ڑ (Re) | /ṛ/ | Retroflex R, strongly rolled "r" | سكنتُ في قريہ پہاڑ کے پاس |
| گ (Gāf) | /g/ | Represents the sound /g/ as in "go" | ذهبنا إلى گجرات في رحلة قصيرة |
| ں (Nūn Ghunnā) | Nasal /n/ | Nasalized "n", produced from the nose | هٰذا أحمَد مں المدينة |
| ے (Baṛī Ye) | Long /e/ | Long "e" vowel or final "ya" sound | قابلتُ علے في المسجد |
4. Controlling Performance & Emotion
You can direct the AI to act like an actor rather than a newsreader. This is done via Modes and Settings.
Level 1: Choosing the Mode
In the generation interface, you will see a checkbox: "Enable Emotions & Dialects Mode".
A. Standard Mode (Box Unchecked)
Best for: Professional narration, audiobooks, e-learning.
- Pauses: To force a silence, add this tag on a new line:
<break time="1.5s" /> - Subtle Emotion: Use context or descriptive tags at the end of a line (experimental):
She looked at the flowers... <With Amazement/>
B. Emotions & Dialects Mode (Box Checked)
Best for: Drama, gaming, character dialogue.
- Emotion Tags: Use Curly Brackets {} with the emotion written in English at the start of the sentence.
- Syntax:
{Emotion} Your Arabic text here. - Examples:
{Shouting},{Whispering},{Laughing},{Sighs}
Level 2: Voice Settings
Fine-tune the output using the sliders:
| Setting | Lower | Higher | Warning |
|---|---|---|---|
| Temperature | Stable, consistent, slightly robotic. Good for news. | More creative and emotional. | Setting too high may cause instability or audio hallucinations. |
| Similarity | Less like original | More like original clone | Keep high for accuracy. |
| Expressiveness | Neutral | Boosts emotional range | For long texts, keep lower to maintain stability. |
5. Mastering Dialects
For Arabic dialects (Saudi, Egyptian, Jordanian, etc.), The Voice MUST Match the Text. If you write in Egyptian slang, you must select a Voice trained on Egyptian dialect. Do not try to force a Standard Arabic (Fusha) voice to speak slang; the result will sound awkward.
The "Priming" Trick
To help the AI recognize the dialect immediately, start your text with a "strong" dialect word.
Example: Instead of starting with a neutral phrase, start with "Izayak, amel eh?" (How are you?). This "primes" the model to stay in the Egyptian "mood" for the rest of the paragraph.